Monday, September 17, 2012

Ruffling my own feathers...

How is it that a project can take months longer than the weeks estimated to completion? It seems impossible to have been so optimistic about the amount of time I thought it was going to take to build the Duck Punt when it has taken so long to get to this point. I guess when you only have a few hours per week and you strive to do the best job you can it is bound to take a while but I had no idea how time consuming a boat build really is. Thank goodness I didn't take on building a tall ship!


A really exciting step happened this week and one I have been waiting a long time for. I was finally ready to mark out and cut the actual sheer line of the boat. The sheer is the curve which defines the side of the boat, and although the Duck Punt has a very subtle sheer, it is still so much nicer seeing that than seeing the ugly coffin box profile it had before. 
The process involved using that long, straight, thin piece of wood called a "batten." I measured up from the bottom of the boat at specific points along the sides, as dictated by the plans, and essentially connected the dots with the batten loosely clamped at the bow and stern. Then I scribed a line along the bottom of the batten marking out the sheer on the side of the boat. Then I grabbed my trusty Festool jigsaw, took a deep breath, and cut to the line!

Defining the sheer.

A long and stressful cut!

 Finally, a boat with an attractive profile!

 The view from the bow. This boat is starting to look fast! (It won't be.)

 The thickness of the sides with the additional sheer plank.

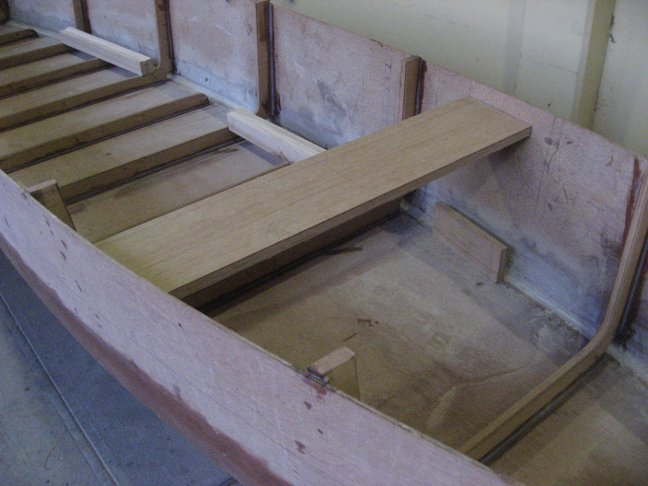
Next I needed to cut the hole for the mast in the mast thwart. Then a test fit of the mast thwart support, to be epoxied in after the mast step is installed. The mast step is the base that the mast sits on in the bottom of the boat. I still need to make the mast step but the thwart looks great! 

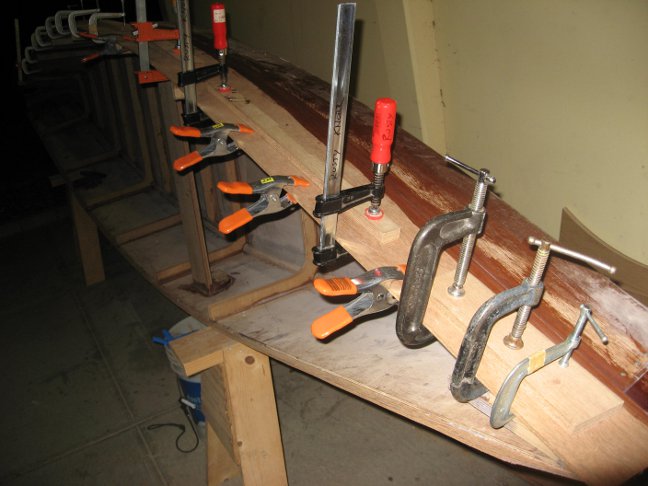
 Another small but necessary step was the construction and installation of the thole pin planks, as I call them. These will be drilled to accommodate the thole pin that the steering oar is braced against. As you remember if you read the last post, I had a crazy clamp-up for the ash laminations. A few passes over the belt sander cleaned up the glue squeeze-out, leaving a beautifully laminated square plank. 

 Unfortunately, the boat is NOT square which means I needed to taper the planks to match the curve of the hull. It was a simple matter of holding the plank up to the hull and tracing it's profile on the plank, then going back to the belt sander and grinding the plank to the line. Below you see there is still more work to do!

 But, after a while you have a profile which matches the curve of the hull perfectly. This of course takes many test fits to get it perfect, (or close enough.)

 Another big step which I wasn't at all sure how I was going to tackle was the feathering of the sheer planks. It turned out to be a lot easier than I thought! I just turned the boat on it's side and worked at the transition with a plane until I had the rough taper, and then finished feathering it in using a palm sander with an aggressive 80 grit paper. I uncovered an epoxy void, but this will all be fiber-glassed over so I am not at all worried about it. 

 A wicked looking bow! Of course I am going to have to soften the bow considerably, but for now I love seeing it looking all tough and mean.

 Another view...

That is all for now! I figure I am about 80% done. There is still a lot to do but when I look at how far I have come I am really happy. I still can hardly believe it but I think I might actually finish this thing! Duck Punt!!!

Monday, September 3, 2012

A boat builder can never have too many clamps...


Or enough, either. Ahhh, clamps. If only I had a hundred of each type! I STILL wouldn't have too many. There is always some little thing you need to clamp that takes a special type of clamp, or one that reaches a certain depth, or is affordable. OK, we all know that clamp doesn't exist. Let's be real...

My apologies for being SO slow with this next post. To be honest, summer finally came to Seattle, and as any Seattleite knows, you enjoy it while you can because in a matter of weeks it is gone and it is back to gray, rainy, cold, wet, misery. So, I have been enjoying the summer instead of boat building, not that boat building is not fun, but...well, anyway. Let's get caught up!

I needed to find something relatively simple to tackle since doing the sheer planks was the next major step and I needed cooler weather for the major amount of epoxy involved in that process. The thole pin planks still needed doing so that was next. I picked up a big chunk of ash and since I don't have a table saw I went to the trusty track saw to cut the laminations. It was a huge cut, barely manageable by the blade depth available, but I made it work and gave the saw a good workout.

The track saw set up for cutting the laminations.


Some of the laminations cut out.


The ridiculously complex glue-up for the thole pin plank laminations. It was already partially cured before I brought it in and set it on the hideous carpet!


Another smaller, but important, step I needed to tackle was the mast thwart. Below you can see the thwart being test fit before the glue up. This is a compound angle and plenty tricky to get it to fit "light tight." Totally unnecessary, but sometimes the cabinet-maker rears his ugly head and the tolerance of a joint becomes an obsessive compulsion. Once in a while it is OK to just go for it though, so I did!


Once the placement of the mast thwart is marked out and it is cut to fit, it is a simple matter of epoxying the thwart in place, as well as the supports fabricated to fit below. 


No, this is not a seat! How many times have I been asked that since I installed this piece? Geez!


There is an arched support piece which gives bracing to the mast thwart. The easiest way to cut the arch is with router on a radius jig. First, you mark out the radius on the board using a huge compass called "trammel points."


Then you transfer the measurement onto the router radius jig and attach the board to the jig. The hole in the jig shows exactly where the router blade is going to cut, making it easy to double check your set-up.


Then it's a simple matter to make shallow cuts with your router until you have cut the arch out of the support. 


While doing these other projects I was doing test fits of the sheer planks and checking clamping set-ups in preparation for attaching the planks.


I need more clamps!!!


The time finally came with a weather window in the 60's at night and I mixed up enough epoxy to coat the side of the boat. I decided that it would be easiest to control the process if the boat was on it's side, and I had marked out the edge of the sheer plank so I would know where to apply the epoxy so I wouldn't have excess all over the place. This step had to be done very quickly so all you see is the final product! Things went suprisingly smoothly considering the size of the job.


Naturally, the bottom edge of the plank needed the benefit of my now skillful "filleting."


The next night I pulled all the clamps off one side, flipped the boat, and glued up the other sheer plank.


 Another view...


Tonight I am going to go pull the clamps off and put the boat back on it's belly. The next step will be marking out the actual sheer at the gunwale and rough cutting the sheer with the jig saw. Then I will fair that curve, round over the frames, attach the gunwales and fair again. Then attach the thole pin planks and drill them, attach the mast thwart arch support, build and attach the mast step, and plank over the bow and stern caps. The last step will be to glass the bottom of the hull, sand, and paint it. The maiden voyage is not too far away on the horizon. Stay with me and we can get there together!